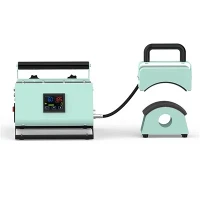
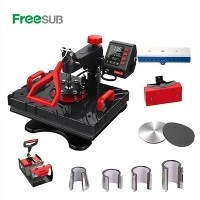
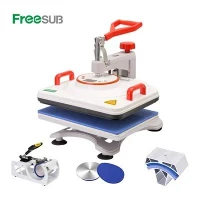
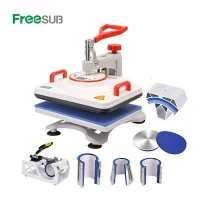
If you’ve ever spent hours lining up a custom design on a shirt, prepping the heat press, and crossing your fingers for a perfect transfer—only to pull the press and see blurry edges, missing bits, or one side that’s way darker than the rest—you know how frustrating that uneven heat press transfer can be. I’ve been on the other side of this, too: I run a heat press machine supply company, so I talk to print owners, small business owners, and hobbyists every single day who’ve wasted vinyl rolls, sublimation paper, and blank shirts because of this exact issue.
The good news? Most uneven transfers aren’t because your machine is garbage (though if you’re rocking a $20 Amazon iron that’s been dropped a hundred times, that’s a whole other problem). They’re fixable with small, science-backed tweaks—no need to buy a brand new machine (yet). Let’s break down the most common culprits and exactly how to fix them, plus a few tips for keeping your transfers smooth every single time.
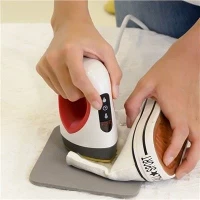
First, let’s talk about pressure. This is probably the number one cause of uneven transfers, and it’s way easier to mess up than you think. Heat presses work by applying consistent, even pressure across the entire platen and your design. If your pressure is too light in the middle, or if the upper platen is tilted just a little, some parts of your design won’t get enough heat and pressure to stick. I’ve seen this so many times: a new customer texts me a photo of a half-baked transfer, and when I ask how they adjusted the pressure, they say “I just cranked the knob until it felt tight.” That’s not how it works. Most clamshell heat presses have an adjustable pressure dial—clockwise for more pressure, counterclockwise for less. The trick is to test it on a scrap shirt first. If you’re using a flat heat press for t-shirts (that’s the Iron press machine for t shirts we stock, by the way), you want the pressure to feel firm but not so tight that you’re straining to close the press. Another test: place a piece of paper on the platen, close the press, and lift it up. If you see smudges all over the paper, your pressure is too high or uneven. If there are faint, inconsistent marks, it’s too light. For portable options, like the Portable Hand Held Heat Press Machine T Shirt Printing, pressure is trickier because you’re holding it by hand. A lot of people press too hard in the center or not enough around the edges—pro tip: rock the press slightly as you apply pressure to get even coverage, or use a heat pad underneath to distribute pressure if your grip is inconsistent.
Next up: heat distribution. Your heat press’s platen might look flat, but over time, it can warp from repeated heating and cooling, or the heating elements might develop hot spots that get hotter in one area than another. I’ve had a customer bring in a press that’s 5 years old, and when we checked the temperature with a thermal gun, one corner was 50°F hotter than the rest. No wonder their transfers were blotchy! How do you check for this? Grab a thermal temperature gun (they’re like $20 on Amazon, worth every penny) and scan the entire platen when the press is heated to your desired temp. If you see hot or cold spots, you can try leveling the platen—most presses have a small adjustment screw on the back or side to tweak the height of the upper platen. If that doesn’t work, it might be time to replace the heating element, but before you do, make sure you’re not pressing too long in one spot. Wait, that’s a common mistake: people will hold the press in place for the full time, but if you have a larger design, the edges might not get enough heat. For a 12x18 inch design, for example, press for half the time, then lift the press, shift the shirt slightly, and press again for the other half. That way, every part gets equal exposure. This is extra important if you’re working with sublimation, where uneven heat can make some areas fade or turn splotchy—we also stock a ton of sublimation gear, like the Coffee mug sublimation machine for custom mugs, and same rule applies there: make sure the heat wraps evenly around the mug, not just one side.
Then there’s the material side of things. If your shirt is wrinkled, or your transfer paper isn’t lined up perfectly, that can cause uneven transfers too. I see this all the time: someone presses a shirt that still has the creases from being folded in the box, and the heat can’t penetrate the fabric evenly, leading to patchy transfers. Fix that by pre-pressing your blank shirt for 5-10 seconds at your press temp to get rid of all wrinkles—this is a non-negotiable step, I don’t care if you’re in a hurry. Also, make sure your transfer is lined up straight, not just by eye—use a T-square or measuring tape to mark the center of the shirt and the center of your design, so everything is perfectly aligned. If you’re using vinyl, make sure you’re peeling the carrier sheet at the right temperature: hot peel for some vinyl, cold peel for others. Peel too early, and you might pull bits of the design off; peel too late, and the edges might lift because the adhesive didn’t set evenly. For sublimation, you need to make sure the sublimation paper is pressed firmly against the fabric with no gaps—any air bubbles or wrinkles between the paper and the shirt will block heat, leading to missing spots.
Pressure and heat are the big two, but there’s one more thing a lot of people overlook: the age and maintenance of their machine. If you’re using a cheap, no-name press that you bought from a craft store 2 years ago, it might not have consistent heating elements or adjustable pressure, which can cause uneven transfers no matter what you do. We get that starting out can be tight on budget, but investing in a decent machine early on will save you way more time and money than fixing botched transfers over and over. For example, the clamshell t-shirt press we carry is built with a flat, level platen and adjustable pressure, so you can get consistent results every time. If you’re branching out into mug presses, having a machine that fits the mug properly is key—we have options like the Double Mug Press Machine Price, which lets you press two mugs at once and ensures even heat around both, or the Pneumatic Cup Press Machine Automatic Mug Press For Tumblers that applies uniform pressure automatically, no hand-adjusting needed.
Wait, let’s circle back to a common mistake I mentioned earlier: cranking the pressure too high. A lot of new press owners think more pressure = better adhesion, but that’s not true. Too much pressure can actually push the transfer material out of place, or cause the vinyl or sublimation ink to bleed into areas you don’t want. It can also warp the platen over time, which leads to uneven heat distribution down the line. The sweet spot for pressure is what makes your transfer stick without any gaps, and you can only find that by testing on scraps. Grab an old t-shirt, a cheap transfer sheet, and do 3-4 test presses with different pressure settings—mark each one so you can tell which is which, and pick the one that gives you the most even, crisp design.
Another fix for uneven transfers if you’ve already messed one up? Don’t throw the shirt away! If you’re dealing with a small area that’s not sticking, you can use a heat press pen (or even a household iron, if you’re careful) to apply extra heat and pressure to that specific spot. Let it cool completely before peeling or checking, and that usually fixes small issues. For larger areas, you can trim off the bad part and re-apply the transfer, just make sure to pre-press the area again to get rid of wrinkles so the new transfer lines up right.
I also want to mention temperature accuracy. A lot of heat presses have built-in thermostats that are off by 10-20°F, which might not seem like a big deal, but for sublimation especially, that’s the difference between a vibrant transfer and a faded one. If your press’s dial says it’s 350°F but it’s actually 330°F, you’ll get uneven heat because some parts might hit the correct temp while others are still too low. That’s why using a thermal gun to check actual temp is so important—don’t just rely on the press’s display.
Let me wrap this up with a quick checklist you can use every time you press a design, to avoid uneven transfers before they happen: 1. Pre-press your blank shirt for 5-10 seconds to remove all wrinkles. 2. Check your press’s platen for warping or hot spots with a thermal gun. 3. Adjust pressure to the sweet spot using a scrap test press. 4. Line up your design perfectly with measuring tools, not just your eye. 5. Apply even pressure (for portable presses, rock slightly to cover edges). 6. Press for the exact time needed, maybe doing a mid-press shift for larger designs. 7. Peel at the correct temperature for your transfer type.


If you’re still dealing with uneven transfers after trying these steps, it might be time to upgrade your machine to one that’s built for consistency. Whether you need a solid t-shirt press, a portable option for on-the-go printing, or a mug press to expand your product line, we’ve got the machines you need to get perfect transfers every time. We work with small business owners, hobbyists, and large print shops, so no matter what your budget or needs are, we can help you find the right gear. If you’re looking to stock up or upgrade your setup, reach out to our team to talk through your needs and find the best heat press solution for you.
References:
- “Heat Press Pressure 101: How to Get Even Pressure Every Time” – Heat Transfer Nation, 2024
- “Sublimation Heat Distribution: Avoiding Blotchy Transfers” – Printful Tech Blog, 2023
- “Common Heat Press Mistakes and How to Fix Them” – Impressions Magazine, 2024
- “Mug Press Setup for Even Heat and Pressure” – Custom Printing Today, 2023