If you run a business that relies on custom branded apparel, mugs, or promotional items, you know an 8 in 1 heat press is the workhorse of your operation. It’s the tool that turns blank products into eye-catching, profitable goods, but over time, it accumulates residue from ink, adhesive, and fabric fibers that can muck up its performance. As a supplier of combo heat press machines, I’ve seen firsthand how skipping regular cleaning turns a smooth press into one that produces blurry prints, inconsistent heat, and even damage to your tools. Today, I’m breaking down the science of cleaning an 8 in 1 heat press, step by step, so you can keep it running like new—plus, I’ll share why regular maintenance matters for your bottom line.
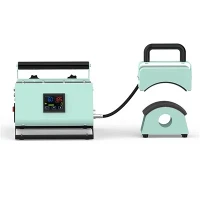
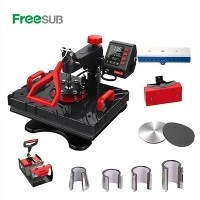
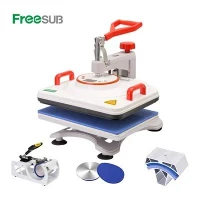
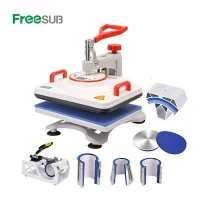
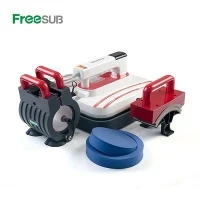
First, let’s get clear on what an 8 in 1 heat press actually does, because that informs how you clean it. Unlike a basic T shirt heat press for sale that only handles shirts, our 8 in 1 model attaches multiple interchangeable platens: for t-shirts, mugs, caps, hats, plates, coasters, and even smaller items like mousepads. That means it’s exposed to far more residual buildup than a single-function machine. Every time you press a shirt, tiny bits of cotton or polyester fiber stick to the heating element, and ink or vinyl adhesive can melt onto the surface when you press decals. For mugs, ceramic dust and sublimation ink residue are common, too. If you use it for hats, you might get foam bits or fabric fuzz, and each of these materials needs a specific cleaning approach to avoid scratching the heating surface or damaging the platen’s shape.
Many new users think they can just wipe the surface with a wet cloth and call it a day, but that’s a mistake. High heat paired with moisture can actually set adhesive residue deeper into the metal, and abrasive cleaners will scratch the non-stick coating that’s designed to let vinyl and sublimation paper release easily. I learned this early on when a customer returned a used combo heat press that had been cleaned with steel wool—we had to replace a $200 heating element, and he lost two weeks of production. That’s why we always recommend following a structured cleaning routine, not just quick fixes.
Before we dive into the steps, let’s talk about the tools you’ll need, because using the wrong supplies is the number one mistake we see as suppliers. You don’t need fancy, expensive products—just a few common items: a lint-free microfiber cloth (old t-shirts work too, as long as they’re 100% cotton), a plastic scraper (never metal, even if it looks soft), isopropyl alcohol (90% or higher, not rubbing alcohol with added moisturizers), a silicone-based heat press cleaner (gentler than alcohol for heavy buildup), and a heat-resistant mat to set your platens on while you clean. It’s also critical to wait until the press is completely cool—at least two hours after your last use. Cleaning a hot press can cause burns, and if you get liquid on a heated heating element, it can warp the metal.
Now, let’s walk through the step-by-step cleaning process, tailored specifically for an 8 in 1 heat press. We’ll break this into sections for the main heating platen, the interchangeable platens (mug, cap, etc.), and the control panel, since each area has unique needs.
First, prep the work area. Unplug the press, make sure it’s cool, and lay down your heat-resistant mat to catch any debris. For the main heating platen (the part that presses t-shirts, plates, or coasters), start by gently scraping away any dried residue or loose material. Hold the plastic scraper at a 45-degree angle to the metal surface, and apply light, even pressure—never dig in. If you feel resistance, stop; you’re either dealing with a particularly stubborn spot that needs more time to soften, or you’re at risk of scratching. The goal is to lift loose bits without damaging the non-stick coating.
Once you’ve scraped away all the big debris, it’s time to wipe down the platen. Dampen a corner of your lint-free cloth with isopropyl alcohol, wring it out so it’s just slightly damp (no drips!), and wipe the platen in circular motions. For lighter residue, one pass is enough, but for heavy build-up from old vinyl adhesive or sublimation ink, you can let the alcohol sit on the spot for 30 seconds before wiping again. Avoid using paper towels here—they leave tiny fibers that stick to the hot surface when you press, and once they’re burned on, they’re almost impossible to remove.
If your main platen has stubborn, discolored spots that alcohol won’t lift, reach for the silicone heat press cleaner. Apply a small amount to your microfiber cloth, and gently rub the spot in circular motions. Silicone cleaners work by breaking down the chemical bonds of old adhesive without being abrasive, and they leave a thin protective layer that helps future jobs release easier. Just make sure you’re not using too much—you don’t want the residue to transfer to your next print.
Next, we move to the interchangeable platens, which are easy to forget but just as important. Your 8 in 1 press comes with multiple small platens for mugs, caps, and other items, and each of these gets its own unique buildup. For mug platens, which are curved to fit the shape of ceramic or stainless steel mugs, the most common residue is sublimation ink dust and tiny bits of adhesive from sublimation sleeves. For this, you’ll use the same isopropyl alcohol and a soft-bristled toothbrush (new, not used for other cleaning) to get into the curves and edges. Gently scrub the platen, then wipe it down with a clean damp cloth. Don’t soak the platen—water can get into the hinges or heating elements of smaller platens and cause damage.
For cap platens, which have a curved shape to fit baseball caps, you’ll often find bits of foam from caps or fabric fuzz stuck in the crevices. Use your plastic scraper to lift away big bits of foam, then use a dry microfiber cloth to wipe away the fuzz. If there’s adhesive residue, a little isopropyl alcohol on a cotton swab (for tight spots) works well—just be careful not to get alcohol on any moving parts of the platen.
We can’t forget the control panel, either. This part is made of plastic, and liquid can damage the digital temperature and time settings. Wipe the control panel with a dry microfiber cloth only—if there’s a sticky spot, use a tiny bit of isopropyl alcohol on the edge of the cloth, making sure no liquid seeps into the buttons. Never spray cleaner directly onto the panel; always apply it to the cloth first.
Now, let’s talk about how often you should do this. For most small to medium businesses that use their heat press 5 days a week, a deep clean like this should happen every 2 months. If you’re running your press 7 days a week, or producing high-volume orders (like 100+ shirts a day), you should clean the main platen after every 20 prints, and do a full deep clean every month. For the interchangeable platens, give them a quick wipe with a dry cloth after every use, and a deep clean once a week, especially if you switch between multiple types of products (like mugs and plates in the same day).
Staying on top of cleaning doesn’t just extend the life of your 8 in 1 heat press—it directly improves your product quality. A clean platen ensures even heat distribution, so your vinyl decals won’t have dry edges, and sublimation prints won’t have faded spots. It also reduces the risk of transferring old ink or adhesive onto new products, which can ruin a customer’s order and cost you money. Last year, a customer of ours told us that after following our cleaning guide, his defect rate dropped by 15%—that’s a huge win for a small business working on tight margins.
If you’re in the market for a combo press, whether you need a versatile model for small batch work or a high-volume machine, we have options to fit every need. Our P8001 Heat Press Combo is a favorite for new businesses, with all the 8 interchangeable platens, digital controls, and a durable heating surface that’s easy to clean. For those who need something more portable, our Portable heat press for t shirts is lightweight enough to take to pop-up shops, but still has the power and versatility of a full-size machine. If you’re starting out, a basic model like our 5 in 1 heat press printing machine is a great step before upgrading to the 8 in 1 for higher demand. We also carry a dedicated Mug t shirt printing machine for businesses that focus primarily on custom drinkware, but with the add-ons, you can expand your offerings as you grow.
One common question we get is: can I use a self-cleaning cycle? Most 8 in 1 heat press models don’t have a built-in self-cleaning feature, so manual cleaning is the only reliable method. There are some commercial heat press cleaners on the market, but as suppliers, we’ve tested dozens, and many of them are overpriced and no better than standard isopropyl alcohol for most residue. The key is consistency, not expensive products.
If you’ve let cleaning slip for a while and have heavy buildup on your platen, here’s a pro tip I learned from our repair team: plug in the press and heat it to 350°F (175°C) for 10 minutes. The heat will soften the adhesive and ink residue, making it much easier to scrape and wipe away. Just make sure you keep the press tilted so any leftover residue falls onto your heat-resistant mat, and don’t leave it unattended while it heats.
When you’re done cleaning, let the press air dry completely before using it again—this takes about 30 minutes, and ensures no leftover moisture gets onto your first print. Once it’s dry, you can apply a thin layer of silicone-based cleaner to the platen as a protective coat, which makes future cleanings even easier.


At the end of the day, your heat press is an investment in your business. An 8 in 1 combo machine can cost anywhere from $200 to $1,000, depending on the model, so taking care of it is just as important as taking care of your printer or cutting machine. Skipping cleaning might save you 15 minutes in the short term, but it can lead to costly repairs, bad customer reviews, and lost revenue down the line.
If you’re looking to upgrade your current press or invest in a new one, we have a range of combo heat press machines to suit every budget and production need. Browse our selection of T shirt heat press for sale and combo models to find the right fit for your workspace, and contact our team to discuss your specific needs. We’re here to help you not only buy the right machine, but also keep it running smoothly for years to come.
References:
- Heat Press Maintenance Guide, Printwear Magazine, 2022
- "How to Avoid Common Heat Press Mistakes", Small Business Trends, 2023
- Combo Heat Press Care Best Practices, ASI Business Resources, 2021
- "Sublimation Print Defect Prevention: Residue Buildup", Transfer Printing Today, 2022