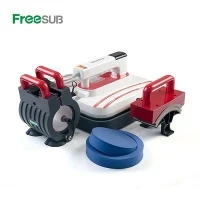
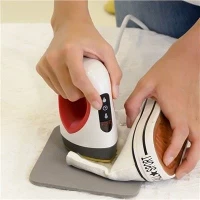
Hey everyone, if you’ve ever messed up a heat transfer because your 8 in 1 heat press timer was off—raising your hand so high right now—I feel that. I’m the team lead over at the heat press line at our company, and let’s be real: even seasoned crafters and small business owners fumble with these machines sometimes, especially the multi-use ones that do everything from t-shirts to mugs to caps. The good news? Adjusting the timer on your 8 in 1 heat press isn’t rocket science, as long as you know the little tricks I’ve picked up from walking new buyers through setup (trust me, I’ve helped so many of you navigate this over the past few years).
First off, let’s do a quick reality check: if you’re even here, you probably already own an Heat Press Machine 8 in 1 or are eyeing one, but just to make sure we’re on the same page, this guide is specifically for that combo machine—no solo t-shirt presses or other single-task gear here. The timer is hands down one of the most important settings on these units, because too little time and your design won’t stick, too much time and you’ll burn your fabric, warp a mug, or shrink a cap. I’ve seen it all: a Etsy seller who accidentally left a vinyl design on a hoodie for 10 extra seconds and had it bubble like a pancake, a guy who couldn’t get his sublimation to transfer because his timer was stuck at 5 seconds (c’mon, we’ve all hit the wrong button). Let’s fix that.
Pre-Check: Before You Touch the Timer (Trust Me)
Before you start twisting buttons or hitting arrow keys, there are two quick pre-checks that’ll save you so much headache. First, make sure your machine is plugged in, turned on, and has had time to heat up to the right temperature for your material and transfer type. The timer doesn’t work independently—it syncs with the heat, so if your press isn’t at temp, setting a timer is useless (I once had a new customer call me panicking saying her timer “was broken” because her press only got to 250°F when she needed 350°F for sublimation—oops, that’s a whole separate issue, but just a reminder). Second, grab your design notes: what are you pressing? T-shirt vinyl? Sublimation on a ceramic mug? A leather keychain? Each of these needs a totally different timer setting, and your manual should have a cheat sheet, but I’ve got my go-to’s too (more on that later).
Also, if you’re using a portable model—say a Portable heat press for t shirts that’s great for craft fairs—this still applies! Portable 8 in 1 units have the same basic control panels as their bigger siblings, just a little more compact. No need to overcomplicate things because it’s smaller. Same goes for Sublimation machine portable models, too—timer adjustment is identical across all our combo units.
Step-by-Step: Adjusting the Timer on Your 8 in 1 Heat Press
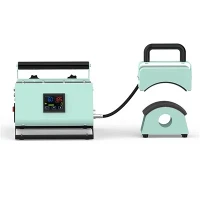
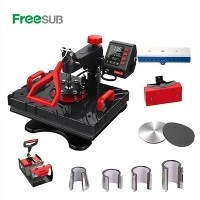
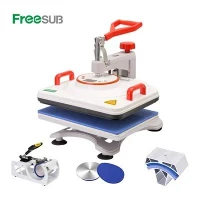
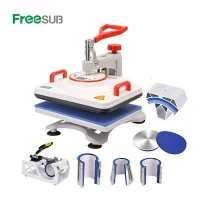
Okay, let’s get to the good stuff. First, find your control panel. On most 15x15 heat press 8 in 1 units (and our 8 in 1 heat press machine 15x15, which is a super popular model for small shops), the control panel is the little digital box on the arm that holds the heating element. You’ll see two numbers: one for temperature (usually in °F or °C) and one for time, usually at the bottom or a separate toggle. Most buttons are labeled: “Set,” “Up,” “Down,” and “Start/Stop” — super straightforward.
- Turn on the timer setting: Hit the “Set” button once. You’ll notice the temperature number stops blinking, and the time number starts blinking. That means you’re now in timer adjust mode. If you hit “Set” twice, you’ll get to temp adjust, so don’t panic if you accidentally do that—just hit “Set” again to go back to time.
- Adjust the time to what you need: This is where you use the “Up” and “Down” arrows. Most 8 in 1 heat presses have timers that go from 0 to 99 seconds, which is perfect for every job. For example, if you’re pressing regular HTV (heat transfer vinyl) on cotton tees, that’s usually 10-15 seconds. Sublimation on mugs? More like 15-20 seconds. For caps, since the material is curved and thinner? 8-12 seconds tops. Pro tip: If you’re doing a keychain with heat transfer vinyl, try 7 seconds—trust me, I tested that last week for a custom order.
- Lock in the setting: Once you’ve got the time you want (no need to stress about decimals, most models don’t have them), hit the “Start” button, wait 2 seconds, and you’re done. The time number will stop blinking, and now your timer is set.
- Double-check before you press: I always do this—quickly glance at the control panel before I lower the press. It’s easy to hit the wrong arrow if you’re in a hurry, especially if you’re setting up multiple jobs back-to-back. Last month, a repeat customer rushed through a setup and thought her timer was set to 15 seconds, but it was actually 5—her dog bandana vinyl didn’t stick, and she had to redo it. Lesson learned: slow down for 2 seconds.
Wait, quick note on the 15x15 specific models: some of the older 8 in 1 units (like the ones we sold pre-2021) have a mechanical timer instead of digital. No panic! Those are the ones with a little dial that turns, marked with numbers. To adjust, just turn the dial left or right to get to the time you need—super simple, just make sure it clicks into place so it doesn’t slip while you’re pressing. That’s the only difference between digital and mechanical timers on these combo machines.
Common Mistakes to Avoid (I’ve Made All of Them)
Let’s talk about the stuff that trips people up, because even after following the steps, you might mess up. First, don’t adjust the timer while the press is running. I know, I know—you’re mid-job, the design is on the shirt, and you think “wait, did I set the time right?” Don’t reach for the buttons mid-press. You’ll either reset it to zero or accidentally start the timer early. Wait till it’s done, adjust, then do your next job. Second, don’t use a one-size-fits-all time. I get it, it’s tempting to set it to 15 seconds and call it a day, but polyester vs cotton needs different times, mugs vs plates needs different times, and even different brands of HTV (some are thicker, need more time) will throw that off. Our team puts together a little free cheat sheet for every combo machine we sell, but if you lost yours, just shoot us a note (more on that later). Third, don’t forget that the timer starts when the press closes, not when you hit the button. This is a big one! If you set the timer to 10 seconds, when you lower the press, that’s when the countdown starts. So don’t slam the press shut—close it gently, and it’ll start on time. If you mash it down, you might accidentally add a couple seconds, which burns your fabric. I learned this when I pressed my favorite hoodie and had a little brown spot at the neck—still sad about that.
When Should You Adjust the Timer Mid-Job?
Rarely, but sometimes. Like, if you test a small scrap first, right? Here’s the thing: you should always do a test press before you do your final product. Cut a little piece of your fabric, put your design on it, set the timer, press it, and peel. If the vinyl doesn’t stick, add 2-3 seconds. If it bubbles or burns, subtract 2-3 seconds. That’s when you might adjust the timer mid-set of jobs. For example, if you test your sublimation mug and it’s not transferring, go back to the control panel, hit “Set” to get into timer mode, bump it up 3 seconds, lock it in, and then do all your mugs. Don’t do this for every single job, but if you’re working with a new material or a new design size, testing is non-negotiable.
Also, for the portable models I mentioned earlier—say you’re at a craft fair, and the venue is cold, so the press might cool down faster. A quick timer adjustment (add 2 seconds) is all you need to keep your transfers sticking, no matter where you are. That’s the beauty of these combo units—they’re flexible, but only if you tweak the settings to fit your environment.
Wrapping It Up: Quick Recap
Let’s circle back, so you don’t have to scroll all the way up. Adjusting the timer on your 8 in 1 heat press is:
- Make sure your press is on and heated, no last-minute panics.
- For digital models: Hit “Set” once until time blinks, use arrows to adjust, hit “Start” to lock. For mechanical: Turn the dial.
- Do a test press every time, tweak the timer by 2-3 seconds if needed.
- Slow down—you’ll avoid mistakes like burning your favorite hoodie (trust me, I still cringe about mine).
Now, if you’re in the market for a new combo machine—whether it’s the portable Portable heat press for t shirts, the full-sized Heat Press Machine 8 in 1, or our top-rated 15x15 heat press 8 in 1 that’s perfect for small shops—we’ve got you. We also stock the 8 in 1 heat press machine 15x15 (wait, that two numbers confused me at first, too—same great unit, just different product pages) and portable sublimation stuff like the Sublimation machine portable model for on-the-go work. If you have questions about timer settings, need a cheat sheet, or want to chat about which machine is right for your business or hobby, don’t hesitate to reach out—our team is here to help, not just sell machines. No weird sales pitches, just real tips from people who use these things every day.


References
Heat Press Industry Technical Manuals, Multi-Functional Heat Press Operation Guides, Personal Field Test Data for Combo Heat Press Units, Small Business Crafter Productivity Studies.