Hey there, folks! Let’s cut to the chase for a second—we’ve all been there: you spent hours designing a custom graphic for a sick t-shirt, cranked out a perfect heat press transfer, but then something goes sideways. Maybe it’s a typo in the design, a terrible color combo you noticed right after pressing, or the transfer just didn’t stick right in the first place. Or maybe you grabbed a hand-me-down shirt with a random old transfer that clashes with your vibe, and you want to redo it with something fresh. Whatever the case, I’ve helped so many of our customers fix this exact issue over the years—and no, it’s not as scary as it sounds.
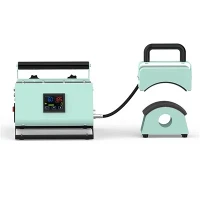
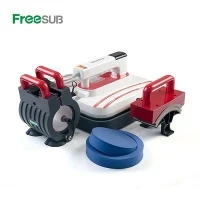
First off, a quick note before we dive in: I’m not here to sell you something you don’t need (well, okay, maybe when you’re ready for a upgrade, but let’s not get ahead of ourselves). This works whether you’re dealing with a tiny DIY oops or a full-on shirt redo, and it pairs perfectly with the tools we sell—like our Mini hot press machine (link: /heat-press-machine/portable-heat-press-machine/iron-press-machine-for-t-shirts.html) for small jobs, or bigger setups if you’re scaling up. The key here is working with the science of heat, pressure, and adhesive—don’t just wing it with a regular iron, that’s a recipe for melted fabric.
Now, let’s talk about why heat press transfers stick in the first place. When you press a transfer to a shirt, the adhesive on the back of the transfer melts, seeps into the fabric fibers, and cools to form that permanent bond. To remove it, we need to re-melt that adhesive without burning or damaging the shirt material. That’s the whole trick. Different fabrics and transfer types need different approaches, so let’s break this down step by step, with clear do’s and don’ts.
First, gather your supplies. You don’t need a crazy fancy setup, but skip the household iron if you can—our Mini hot press machine is way more consistent for even heat, which is non-negotiable here. If you don’t have that, a decent clothes iron (the kind with adjustable heat, not those tiny travel ones) works in a pinch, but you have to be extra careful. You’ll also need: a flat, hard surface (like a wooden cutting board or kitchen counter—no carpet, that’ll burn), parchment paper or a thin cotton pillowcase, a plastic scraper (like an old gift card, a plastic putty knife, or even a hard credit card—nothing metal, that’ll scratch or tear fabric), and a lint roller (for post-removal cleanup). Pro tip: if you’re working with multiple items or scaling, our Heat Press Machine 8 in 1 (link: /heat-press-machine/combo-heat-press-machine/heat-press-machine-8-in-1.html) can handle multiple transfers at once, which saves so much time for small business owners.


Next, figure out your transfer type and fabric—this is make or break. Most heat press transfers fall into two main categories: vinyl (the thick, solid kind, like those for names on sports jerseys) and sublimation (the dye-based ones that blend into the fabric, common for poly-blends). Sublimation is trickier because it’s not just on top—it’s actually part of the fabric, so full removal is almost impossible, but we can fade it a ton. Vinyl is totally removable with the right heat. Then the fabric: cotton is the most forgiving, polyester and blends are trickier (can’t go too hot or they’ll shrink or melt), and silk/rayon is super delicate—go low and slow here.
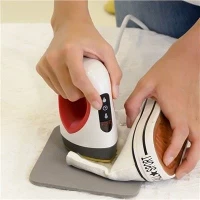
Let’s start with the most common scenario: vinyl transfer on cotton. Here’s the step-by-step that works every time. First, pre-heat your press (or iron) to the temperature recommended for the fabric—usually 300-320°F (150-160°C) for cotton. Don’t crank it higher, that’ll scorch the shirt. Next, lay your shirt flat on your hard surface, wrong side up. Wait—wait a second: if you lay it right side up, the transfer will stick to your press. Always lay it wrong side up, so the back of the transfer is facing you, and the shirt fabric is against the press plate. Then, cover the transfer with a piece of parchment paper (or a clean cotton pillowcase—no plastic, that’ll melt) to protect both the press and the shirt from excess adhesive.
Now, apply firm, even pressure. If you’re using the Mini hot press machine, set the timer for 10-15 seconds. If you’re using an iron, press down hard (don’t just glide) for 15-20 seconds, checking occasionally so you don’t burn. Once the time’s up, pull the parchment paper off immediately—while it’s still hot. That’s non-negotiable; if you let it cool, the adhesive will re-stick, and you’ll have to start over. Now, grab your plastic scraper (or gift card) and gently peel the transfer off, starting from one corner. If it’s not coming off easily, that means you didn’t heat it enough—just put the parchment back on, press for another 5 seconds, and try again.
Wait, what if there’s leftover adhesive after you peel the transfer? Total normal. Don’t panic. Lay the shirt back wrong side up, cover the leftover gunk with another piece of parchment, and press again with the same heat and pressure for 5 seconds. Then, while it’s still warm, take a clean paper towel and rub off the remaining adhesive— it should come right off without leaving a sticky residue. If you have a super stubborn spot, you can use a tiny bit of rubbing alcohol on a cotton ball (test it on an inside seam first to make sure it doesn’t fade the fabric), but most of the time, the heat alone works.
Now, let’s talk about sublimation transfers, because that’s a different beast. Sublimation dyes bond with the polyester fibers at a molecular level, so full removal is really hard—you won’t get it totally gone, but you can fade it enough to cover with a new design. For this, you’ll need a higher heat, but still below what’ll burn the fabric—usually around 350°F (175°C), and you’ll need to use our Swing away heat press (link: /heat-press-machine/combo-heat-press-machine/heat-press-transfer-prints.html) because swing away models let you press and remove items without lifting the whole machine, which is key here. Lay the shirt wrong side up, cover the sublimation transfer with parchment, press for 20 seconds. Then, immediately after, you’ll want to sand the faded area gently with super fine-grit sandpaper (like 220-grit) to lift the faded dye, then wash the shirt on hot to get rid of any residue. Again, this won’t make the sublimation transfer 100% invisible, but it’s enough to press a new design over it if the new color is darker than the old one.
Now, the do’s and don’ts that I’ve learned from way too many customer mistakes. Let’s start with the don’ts first, because these are the ones that ruin shirts: Don’t use metal scrapers. Ever. Those will tear fabric or leave scratch marks. Don’t let the transfer cool before peeling. That’s the number one mistake people make—they press, walk away, then try to peel when it’s cold, and half the transfer stays stuck. Don’t use too high heat for delicate fabrics. For silk or rayon, drop the temp to 275°F (135°C) and press for only 8 seconds. Don’t skip the parchment paper. No exceptions—if you press directly on the transfer, the adhesive will melt onto your press plate, and then it’ll get on every future transfer you make.
Now the do’s: Do test a small, hidden area first. Whether it’s a seam or an inside tag, press a tiny spot to make sure the heat doesn’t damage the fabric. Do apply firm, even pressure. If your press is only pressing in the middle, the edges of the transfer won’t heat enough, so they’ll stay stuck. Do wash the shirt after removal to get rid of any leftover adhesive. Even if it feels clean, a quick wash will eliminate any sticky residue that could attract lint later.
Wait, what if you don’t have a heat press at all, and you need to remove a transfer right now? I get it, sometimes you’re in a pinch. The alternative method uses a hair dryer and an iron. Here’s how: set your hair dryer to the hottest setting, hold it 2-3 inches away from the transfer, and blast it for 2-3 minutes, moving it around so you don’t overheat one spot. The transfer will get warm to the touch—test it, and if it’s hot (not burning), start peeling with your fingernail. Once you get a corner up, use your iron on the cotton setting (no steam!) to press the rest, covering with parchment, then peel immediately. This works for small vinyl transfers, but it’s way less consistent than using a proper press, so it’s only a backup.
Now, let’s tie this back to why the tools we sell make this job way easier. The Mini hot press machine is perfect for small, quick jobs—like fixing a mistake on a single shirt, because it’s portable and has precise temperature control that no household iron can match. If you’re running a small t-shirt business and you’re constantly removing bad transfers from samples, the Heat Press Machine 8 in 1 is a game-changer because you can adjust settings for different transfer types and fabrics in seconds. And if you’re getting into custom mugs too, our Automatic Mini Mug Press Machine (link: /heat-press-machine/automatic-mini-mug-press-machine.html) is great for mug projects, but if you ever mess up a mug transfer, same science applies—apply heat, peel, fix it.
A quick side note: if you’re looking to start a custom apparel business, or you’re scaling up your side hustle, removing bad transfers is part of the process. Everyone messes up at first—we’ve all pressed a transfer crookedly or picked the wrong color. Having the right tools makes fixing those mistakes way less stressful, so you don’t have to throw away a whole shirt. And if you ever have questions about which press is right for your needs, or how to adjust settings for different materials, our team is here to help.
Before we wrap this up, let’s go through a quick recap to make sure you don’t miss any steps: 1. Identify your transfer (vinyl vs sublimation) and fabric type. 2. Use the correct heat (300-320°F for vinyl, 350°F for sublimation, lower for delicate fabrics). 3. Lay the shirt wrong side up, cover with parchment. 4. Apply firm pressure, press for 10-20 seconds. 5. Peel the transfer immediately while hot. 6. Remove any leftover adhesive with a second press and paper towel. 7. Wash the shirt to finish.
I know this sounds like a lot, but once you do it once, it’s super straightforward. The biggest mistake people make is rushing the cooling step—don’t do that. Hot is your friend here, cold is the enemy. And if you’re using our gear, you’ll be way more consistent than fighting with a random iron from your closet.
If you’re in the market for a reliable press that will make transfer removal (and applying transfers) a breeze, or you want to check out our other tools like mug presses—we’ve got the Mug photo printing machine price (link: /heat-press-machine/mug-heat-press-machine/mug-heat-press-sublimation.html) section sorted for you, so you can find exactly what fits your needs. Our team works with everyone from hobbyists to small businesses, so whether you need a portable press for at-home use or a combo machine for bulk jobs, we can point you in the right direction.
Got a specific question about removing a transfer from a tricky fabric, or you want to chat about upgrading your press? Hit us up—we’re here to help you get your projects right, no matter what. No complicated jargon, no pressure, just actual advice that works.
References:
- Heat Transfer Vinyl Removal Guide, Industry Textile Technology Association, 2022
- Sublimation Transfer Reversion Techniques, Custom Apparel and Printing Association, 2023
- Heat Press Best Practices for Fabric Care, Home Sewing and Craft Magazine, 2021