If you’re running a small custom merch business, or just starting out with sublimation mugs, you’ve probably messed around with your 8 in 1 heat press before—thinking “why won’t this design stick? Why is half my image faded or peeling a week later?” I get it, I’ve been there. When I first started selling custom mugs at my local farmers market, I skipped the pressure adjustment step on my combo machine and ended up with a whole shelf of wonky, half-finished mugs that cost me time and money. That’s why today, I’m breaking down exactly how to dial in the pressure for mugs on your 8 in 1 heat press—plus a few pro tips I’ve picked up over years of selling these machines and helping hundreds of my customers fix their press headaches.
First off, let’s talk about why pressure matters here. Sublimation works by turning solid dye into gas, which then bonds with the polyester coating on your mug. Too little pressure, and the heat and dye can’t evenly reach every spot on the mug’s surface—your design will be patchy, light, or missing in spots. Too much pressure, on the other hand, can cause the sublimation paper to stick to the mug, leading to ugly smudges, or even warp thinner mugs (I’m looking at you, cheap thin 11oz mugs that can’t handle extra squeeze).
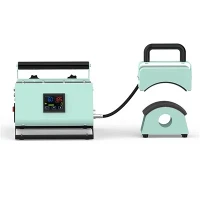
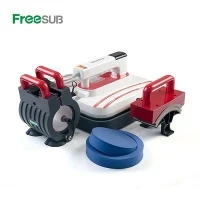
Before we jump into adjusting, let’s make sure you’re on the same page about what we’re working with. An 8 in 1 heat press is versatile—it works for mugs, t-shirts, hats, plates, and more—but each accessory (like the mug attachment) has its own sweet spot. If you’re still curious about other combo press options for different projects, we’ve got a 12x15 5 in 1 heat press for smaller runs, plus a Sublimation Machine 8 in 1 that’s built for heavy-duty daily use. There’s also a dedicated Heat press cup machine if you do mostly mugs, or if you want to compare all top picks, our Top 10 heat press machines roundup breaks down what works best for every budget. For smaller spaces or lighter use, our 5 in 1 sublimation heat press is a solid pick too. But back to our main event: adjusting pressure for mugs on the 8 in 1.


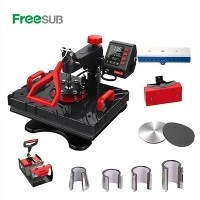
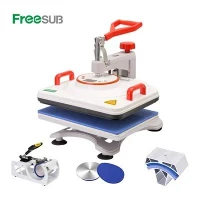
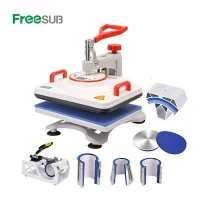
First, let’s figure out where the pressure adjustment knob even is on your 8 in 1. Most combo presses—including ours—have a big metal knob on the side of the main press head, right near the hinge. That’s your pressure control. Some cheaper models might have a spring-loaded arm that you adjust with a pin, but 9 times out of 10, the 8 in 1 we sell has that side knob. Let’s start with the basics: you shouldn’t have to muscle the press closed, and it shouldn’t feel like it’s going to slam shut on your fingers. A good rule of thumb for mugs specifically is that the press should close with moderate, even pressure—like how hard you squeeze a can of soda to seal it before putting it in a fridge. Too tight, and you’ll bend the mug handle or warp thin ceramic. Too loose, and you’ll get that patchy design I mentioned earlier.
Now, let’s talk about the test run. Don’t just adjust and press a customer order right away—do a test with a plain white polyester mug, some leftover sublimation paper, and maybe a scrap of your usual design. Here’s the step-by-step I tell all my customers:
- Prep your mug and design like you normally would: trim the sublimation paper so it fits tight to the mug, use heat-resistant tape to hold it in place (pro tip: use low-temp tape for mugs, not high-temp, which can leave residue), and slide it into the mug attachment on your 8 in 1. Make sure the attachment is locked securely so the mug doesn’t shift while pressing.
- Preheat your press to the correct temp for mugs—usually 380°F (193°C) for 60-90 seconds, depending on your mug. Double check your mug packaging, some mugs need a little less or a little more time.
- Now, adjust the pressure. Start with the knob turned all the way counterclockwise (loose) to reset it, then turn it clockwise 2 full turns. Close the press, and see how it feels. If it closes super easy, like it’s barely touching the mug, that’s too loose. Turn the knob another half-turn clockwise, then test again.
- Once you get to a point where the press feels like it’s making firm, even contact all around the mug (not just the top or bottom), do your test press. When it’s done, peel the paper off slowly while it’s still hot (that’s the best time to peel for sublimation). Now look at the design: is it bright, even, no light spots? If it’s a little faded or has faint lines, you need more pressure—turn the knob a quarter turn clockwise, and test again. If the design is smudged, or the mug feels warm to the touch all over when you peel (that’s a sign too much pressure is making heat transfer uneven), you need less pressure—turn it a quarter turn counterclockwise.
Wait, but why do I say small increments? Because mugs are small, and the pressure only needs tiny adjustments. Unlike a t-shirt, where you might turn the knob a full turn, a mug’s pressure sweet spot is really narrow. I’ve seen new folks turn the knob all the way tight on their first test, and end up with a mug that’s warped and a press that’s hard to open. Start small, test often, and you’ll get it right in 2-3 tries max.
Also, not all mugs are the same. 11oz standard mugs are the most common, and they work best with that moderate pressure we talked about. But 15oz mugs, skinny tumblers, or ceramic mugs with thicker walls might need a tiny tweak. Thinner mugs (like some budget tumblers) actually need a little less pressure—turn the knob a quarter turn looser than you would for a standard 11oz. Thicker mugs, like large 20oz sublimation tumblers, might need an extra quarter turn of pressure, but don’t go overboard. I always recommend testing a scrap of the same mug you’ll use for orders if you’re switching sizes, even if it’s the same brand.
Another common mistake people make: not checking the pressure after a while. The spring in your 8 in 1 heat press can loosen over time, especially if you use it every day. So every 50-100 presses, give your pressure a quick check. Do the same test: close the press on an empty mug (no paper) and see how much force it takes. If it feels looser than it did last time, tighten the knob a quarter turn. It’s a quick check that saves you from ruining a whole batch of mugs.
Wait, what if you’re using a different attachment? Some 8 in 1 presses come with multiple mug attachments—like for standard mugs, skinny tumblers, and even large water bottles. Each of these might need a tiny pressure adjustment. The skinny tumbler attachment is smaller, so you might need a little less pressure than you would for a standard mug, because the contact point is tighter. I learned that the hard way—first time I pressed a batch of skinny tumblers, I used the same pressure as 11oz mugs and ended up with designs that were too dark in the middle and faded on the edges. Oops.
Also, let’s talk about the difference between our 8 in 1 and other combo presses. A lot of my customers come to me after buying a cheap no-name 8 in 1 off Amazon, complaining they can’t get the pressure right. Our 8 in 1 (and the Sublimation Machine 8 in 1 we sell) has a precision pressure knob that makes it way easier to dial in, compared to those cheap ones that have a flimsy arm. But even if you’ve got another brand, the steps I’m talking about still apply: small increments, test often, adjust for mug size.
If you’re still having trouble after a couple tests, here are a few quick fixes I tell my customers: First, make sure your mug is sitting straight in the attachment. If it’s tilted to one side, only half the design will get pressure, leading to patchiness. Re-lock the attachment so it’s centered. Second, check if your sublimation paper is the right size. If it’s too small, it won’t press evenly, so you’ll think the pressure is off when it’s actually the paper. Third, make sure your press head is level. If it’s tilted, it’ll only press one side of the mug. Most combo presses have a level adjustment on the main head, so give that a quick check if you’re noticing uneven pressure every time.
Now, let’s wrap this up with what matters most for your business. Getting the pressure right for mug sublimation on your 8 in 1 heat press doesn’t have to be a guessing game. Follow those small, incremental adjustments, test with scrap mugs first, and tweak for the mug size you’re using, and you’ll stop wasting money on ruined mugs and start selling bright, even designs that customers love. If you’re in the market for a new press that’s built for reliable, consistent pressure (so you don’t have to adjust every 10 presses), check out our top picks for combo machines—whether you need a versatile Top 10 heat press machines to compare, or a dedicated Heat press cup machine for all your mug work.
If you’re looking to bulk up your gear for a growing business, or just have questions about adjusting your 8 in 1 pressure for a specific project, don’t hesitate to reach out. We help hundreds of press operators every month nail their mug sublimation, so we’re here to make sure you don’t make the same mistakes I did when I first started.
References:
- Sublimation Heat Press Best Practices. Heat Transfer Vinyl Association, 2023.
- Mug Sublimation Pressure and Temperature Guidelines. Merch Business Hub, 2024.
- 8-in-1 Combo Press Maintenance and Adjustment Guide. Combo Press Industry Group, 2023.